How To Use Matercam To Replace N95 Mask Machine Shaft
How To Use Matercam To Replace N95 Mask Machine Shaft
|
This article describes the method and process of replacing the mask shaft |
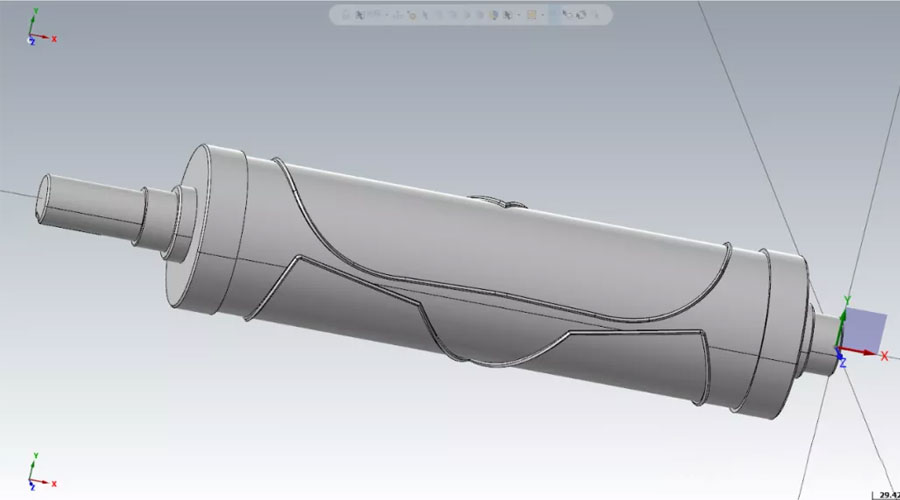
Transfer the drawing file to the software, and place it as shown in the following figure. How to place the actual processing, the corresponding setting in the software can be.
Follow the picture below
1.All graphics window selection, copy the graphics to the second layer, back up the original graphics.
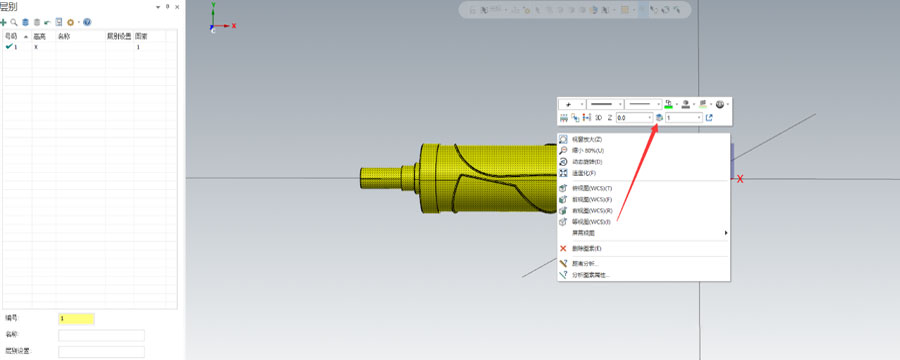
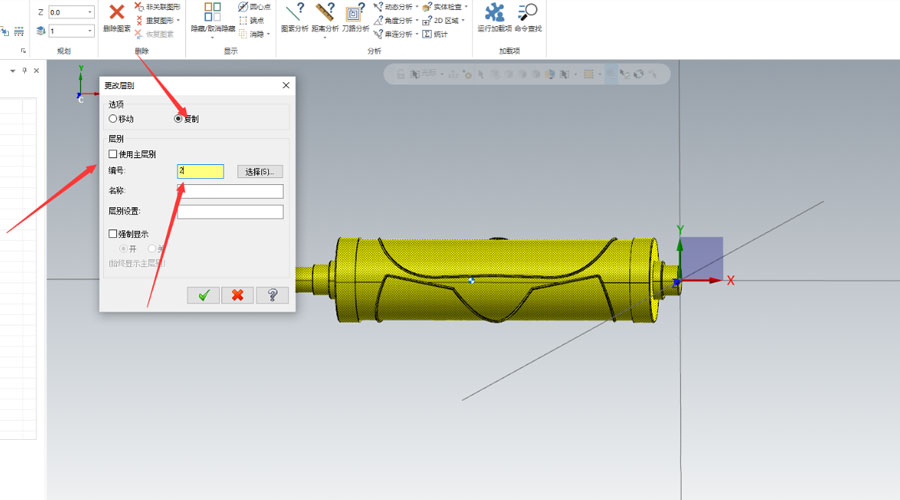
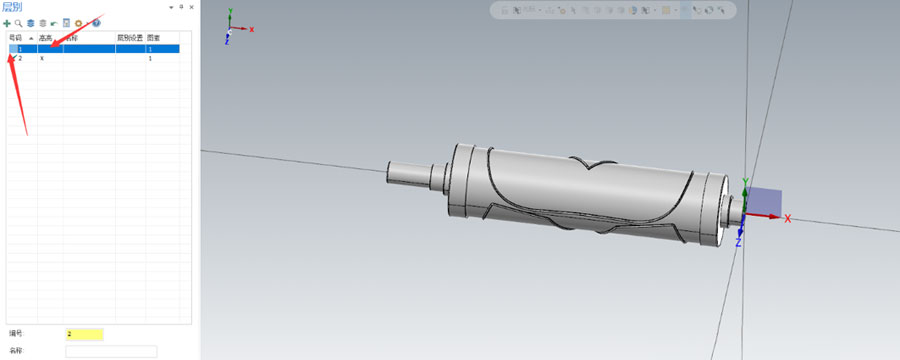 3. Create layer three.
 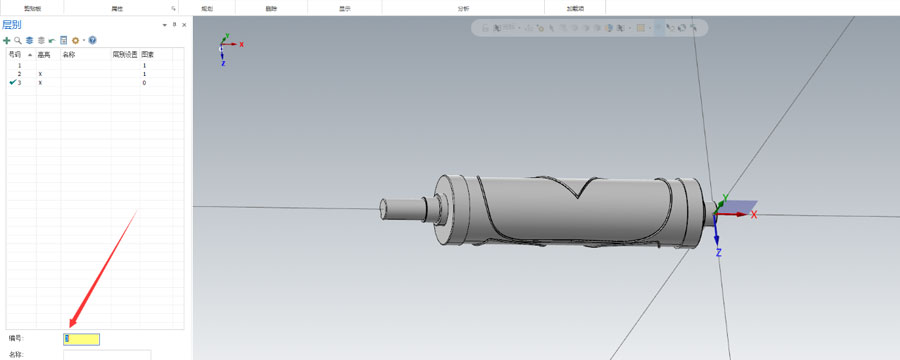 4.What is a knife mold?
A knife mold is a cylinder with a circle of cutting edges. It is assembled on a mask machine to cut the fabric. All we have to do is make the cutting edge of the cutting mold. The tool path is to achieve the corresponding boundary. Convert the solid part of the edge of the blade edge into a curved surface, and place the obtained curved surface on the third layer
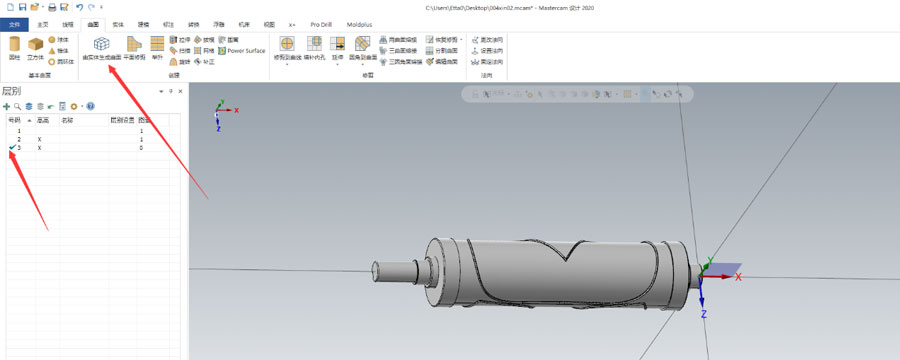
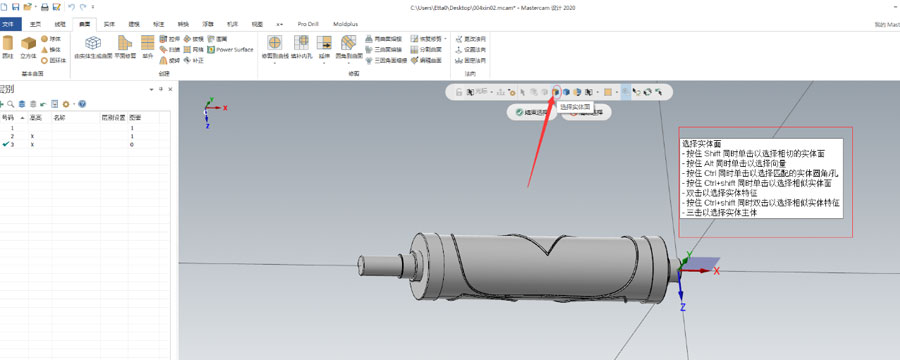
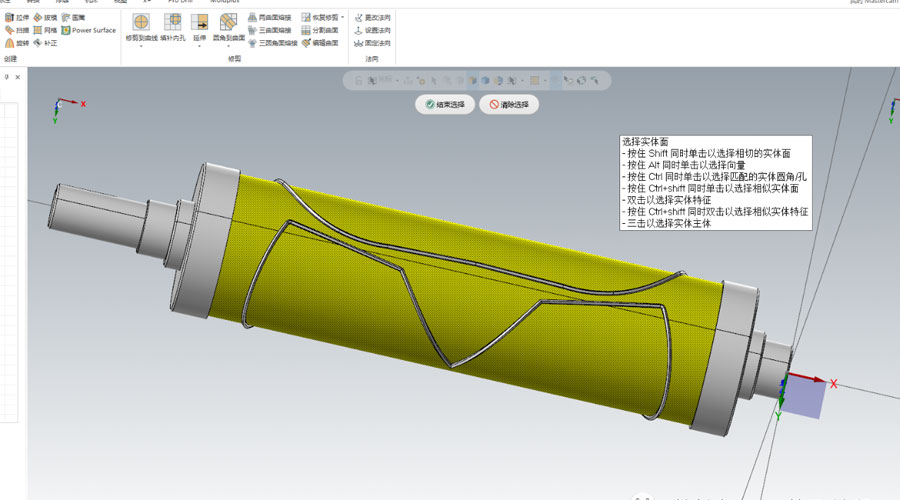
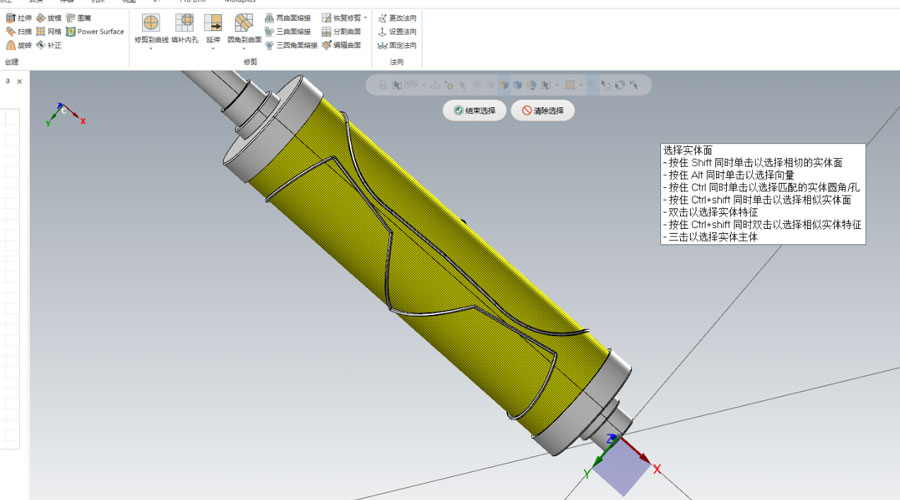 5. Get the following result
 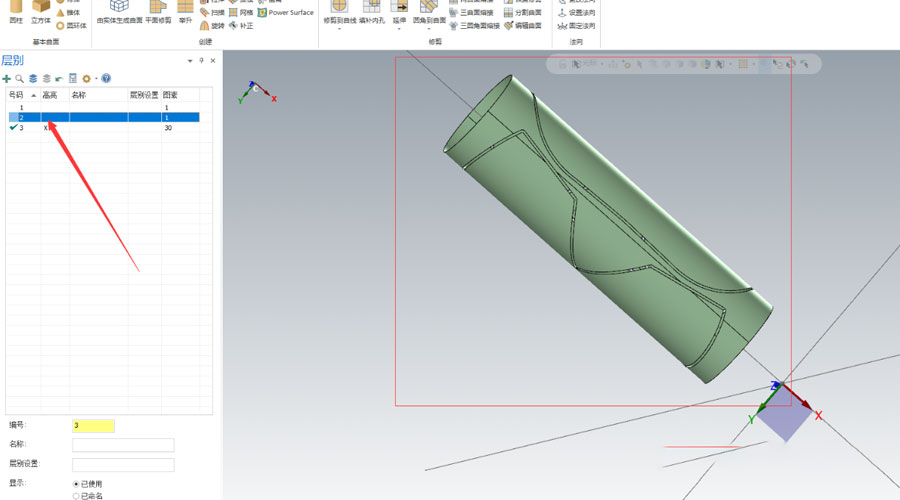 6. Establish layer 4 and extract all the boundary lines of the surface. Pay attention to the 3D mode.
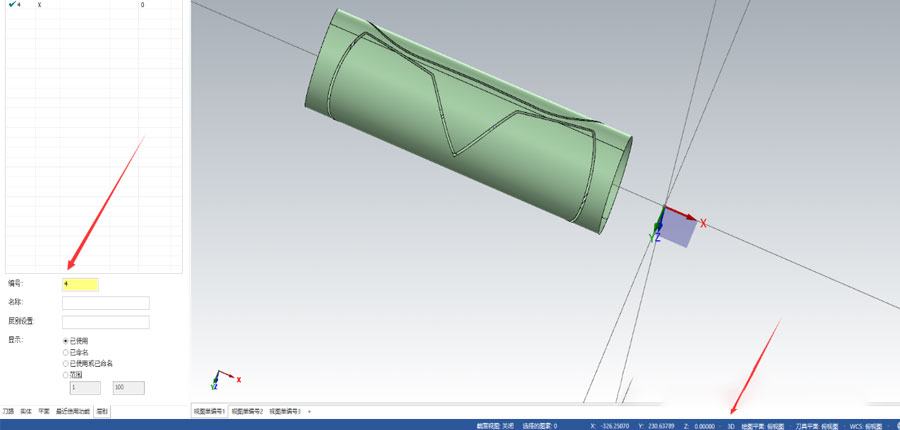
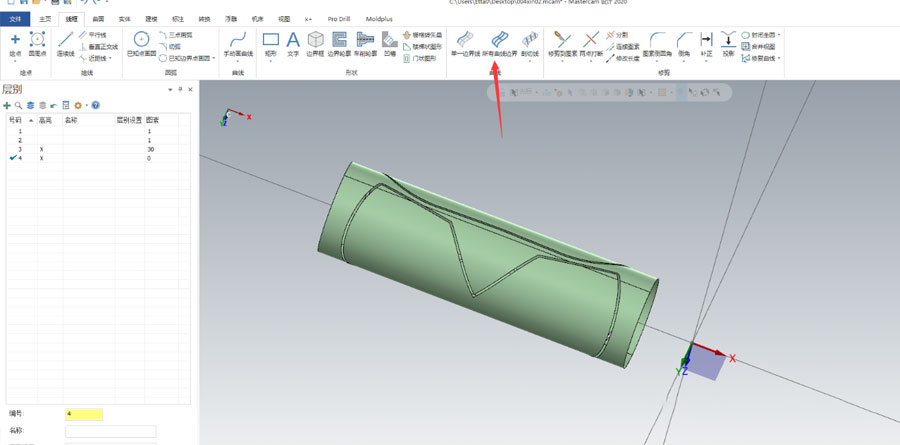 7. Select all the surfaces in the window and click OK. After obtaining all the curves, hide layer 3 and only keep layer 4 until the final effect. Here, all the boundaries near the edge of the knife mold are extracted.
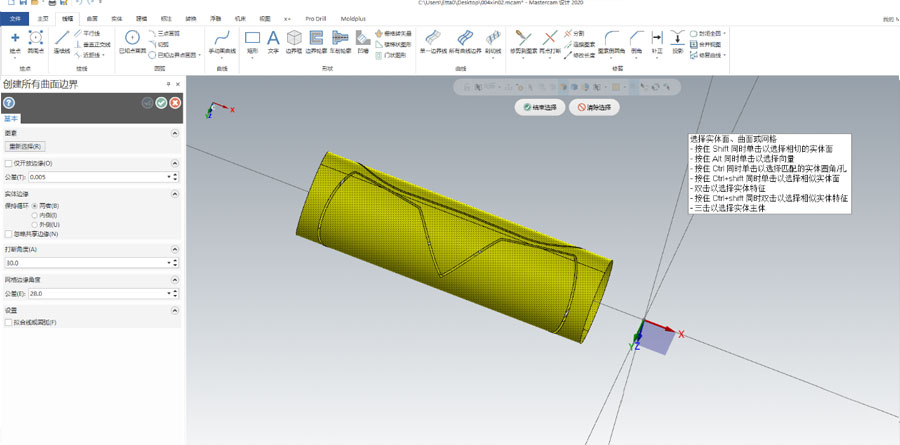
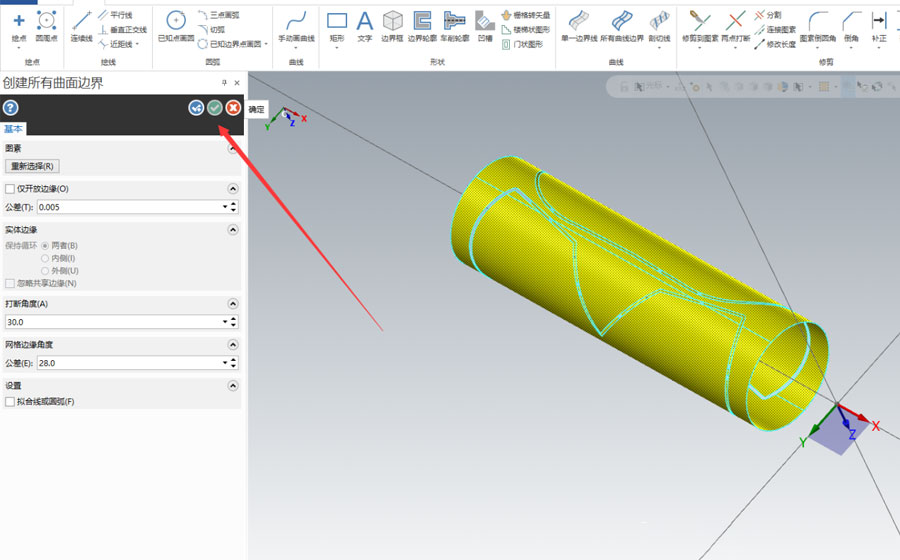
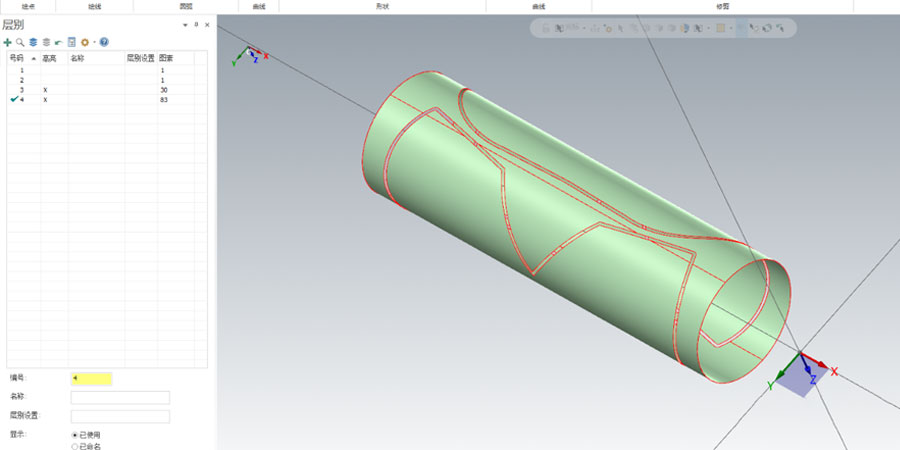
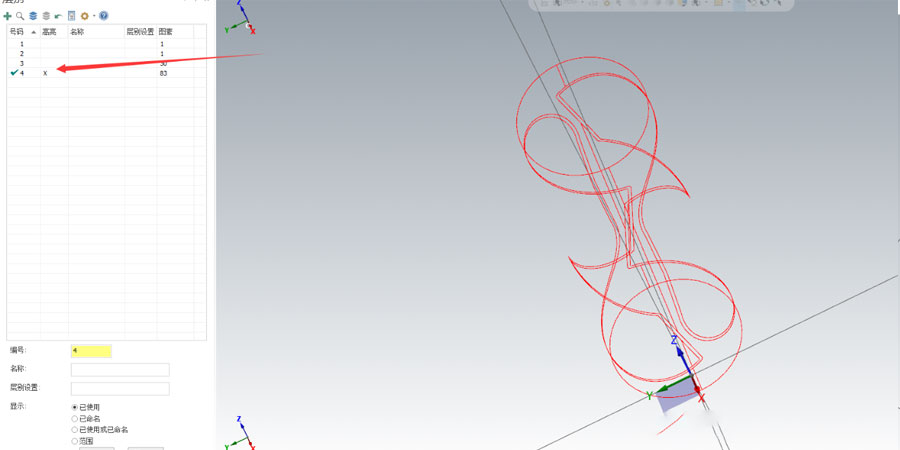 8. Open layer 1 and see if the wireframe coincides with the entity, whether there is any omission.
 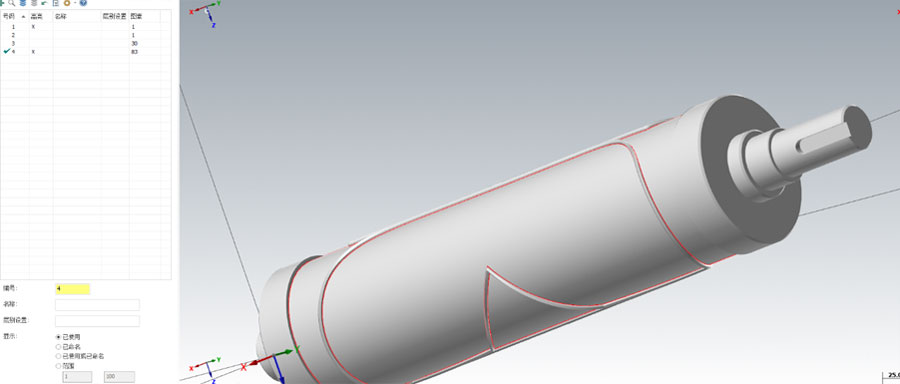 9. Create layer 5 and copy the wireframe to layer 5.
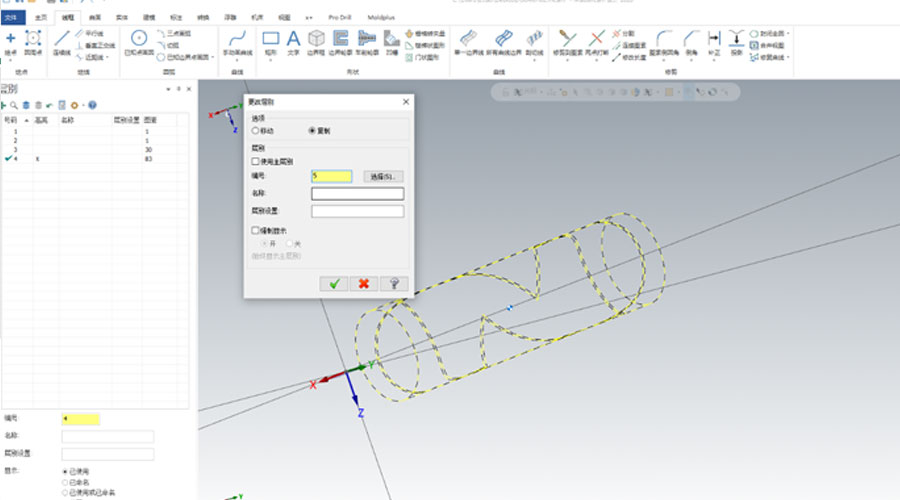
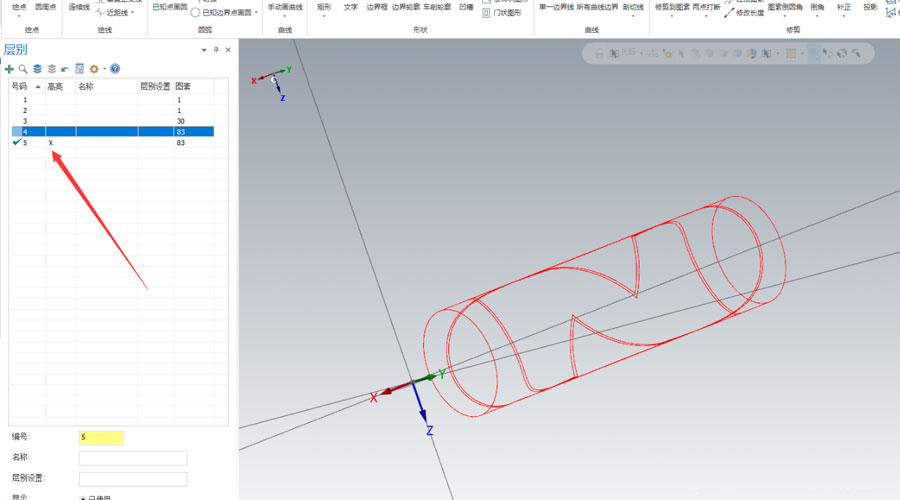
10. Delete extra pixels.
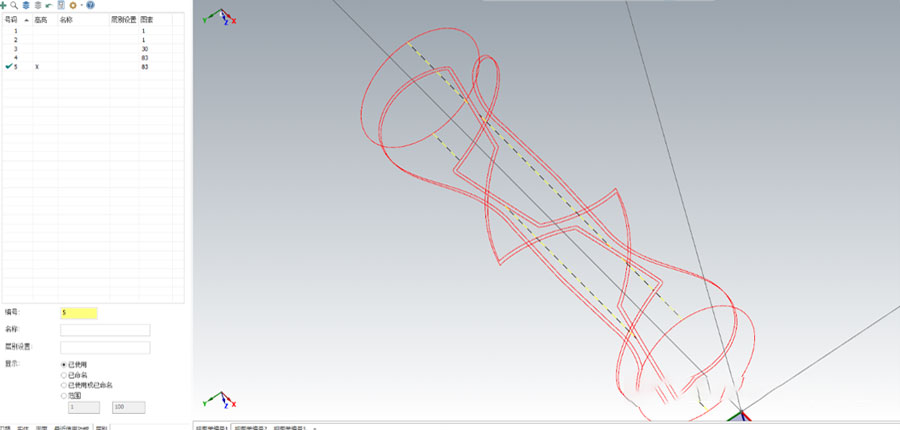 11.Right-click on the desktop and select the top view
 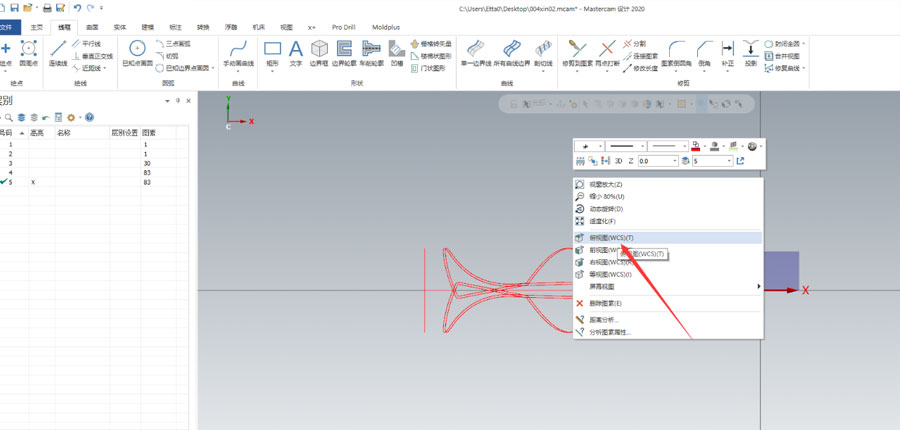 12.Expand the pixels on the cylinder to the top view.
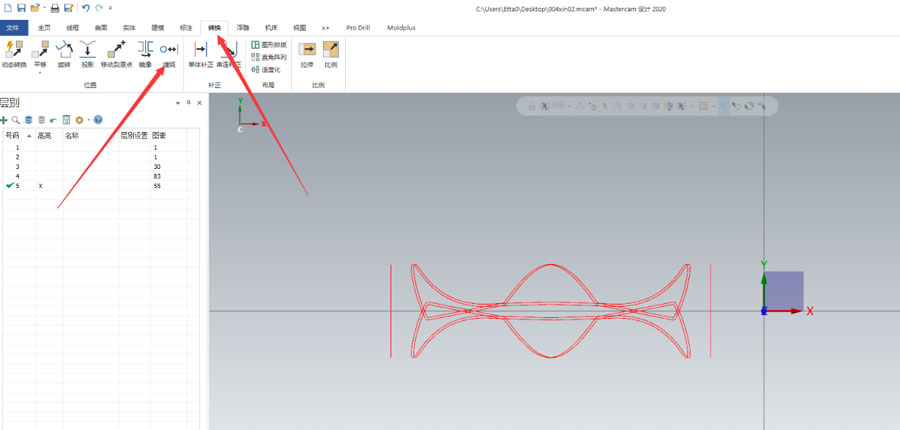
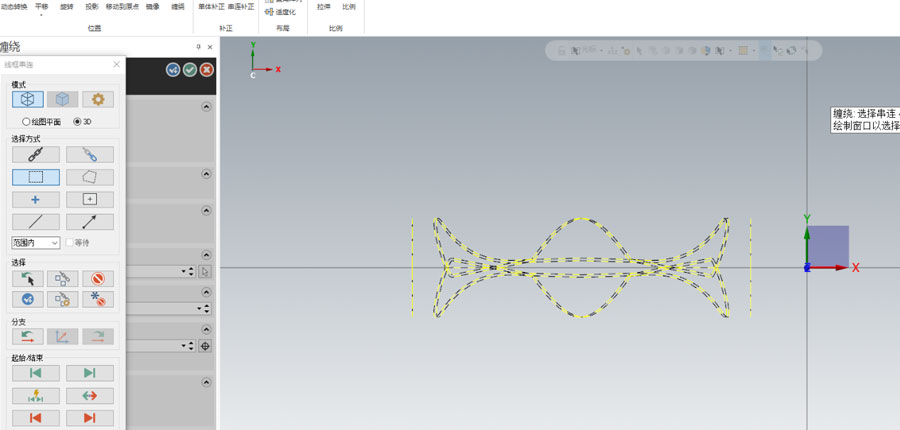
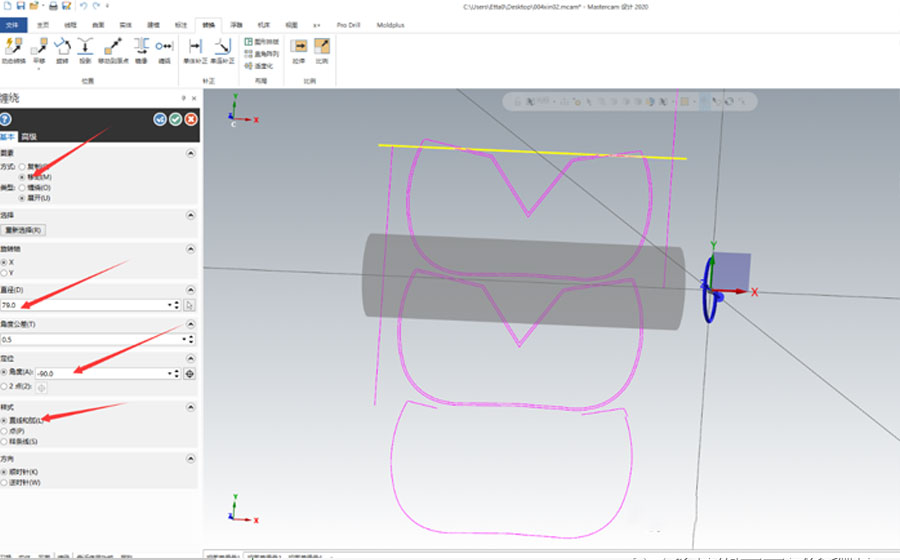 13. The parameters are as shown in the figure below, resulting in the following shape.
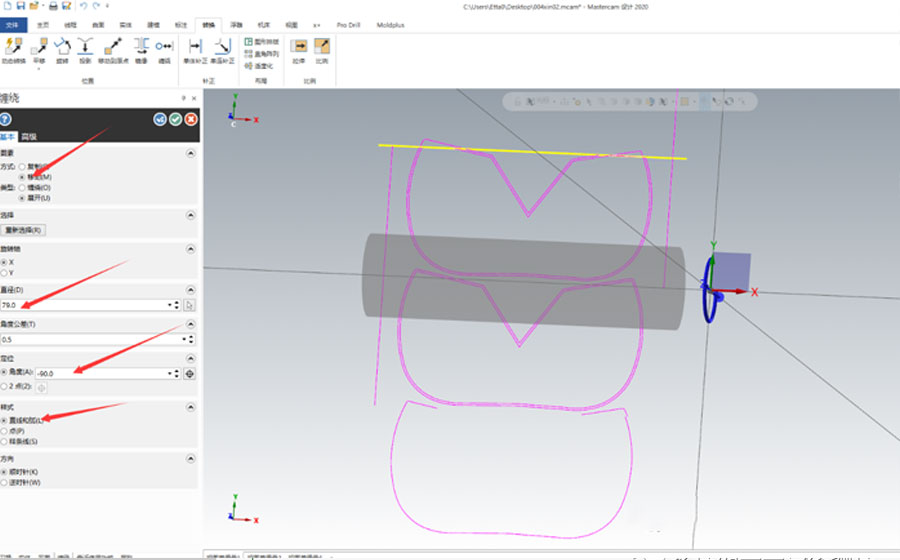
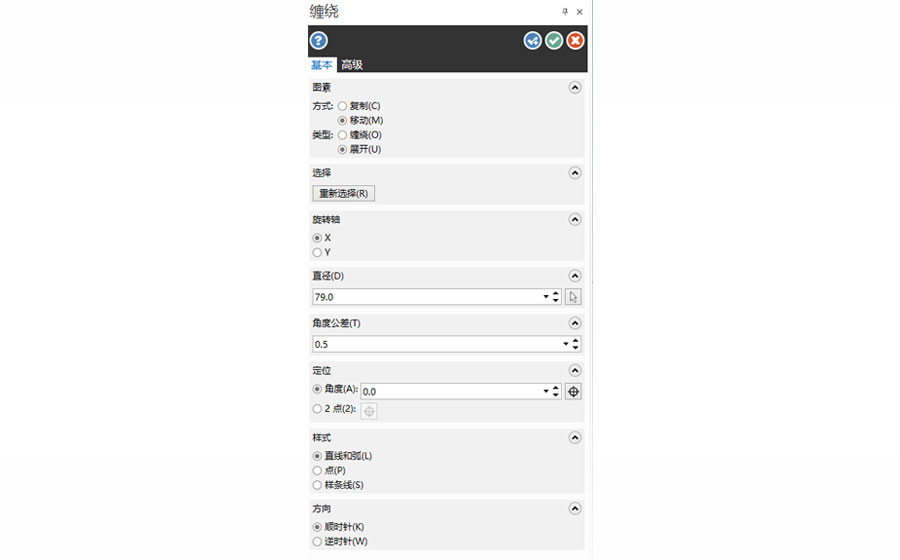
In the replacement axis, we need to expand the pixels on the original surface of the standard into the plane, so the type is expanded, and the way to top is according to your needs. The copied picture is to retain the 3D graphics and 2D planar graphics, and the pixels overlap to a layer It is not suitable for programming, and in the previous step we have copied the pixels to other layers, so there is no need to keep the original graphics, just move it.
The rotation axis takes a vertical four-axis machining center as an example. The rotation axis is the masks machine parts, so the rotation axis is the A axis.
Diameter, the diameter referred to here is the diameter of the pixel wound on the cylinder, the actual size is subject to the actual pixel.
Style, select the default method.
Direction, default.
Link to this article: How To Use Matercam To Replace N95 Mask Machine Shaft
Reprint Statement: If there are no special instructions, all articles on this site are original. Please indicate the source for reprinting:https://www.cncmachiningptj.com/,thanks!
 PTJ® provides a full range of Custom Precision cnc machining china services.ISO 9001:2015 &AS-9100 certified. 3, 4 and 5-axis rapid precision CNC machining services including milling, turning to customer specifications,Capable of metal & plastic machined parts with +/-0.005 mm tolerance.Secondary services include CNC and conventional grinding, drilling,die casting,sheet metal and stamping.Providing prototypes, full production runs, technical support and full inspection.Serves the automotive, aerospace, mold&fixture,led lighting,medical,bicycle, and consumer electronics industries. On-time delivery.Tell us a little about your project’s budget and expected delivery time. We will strategize with you to provide the most cost-effective services to help you reach your target,Welcome to Contact us ( [email protected] ) directly for your new project.
- 5 Axis Machining
- Cnc Milling
- Cnc Turning
- Machining Industries
- Machining Process
- Surface Treatment
- Metal Machining
- Plastic Machining
- Powder Metallurgy Mold
- Die Casting
- Parts Gallery
- Auto Metal Parts
- Machinery Parts
- LED Heatsink
- Building Parts
- Mobile Parts
- Medical Parts
- Electronic Parts
- Tailored Machining
- Bicycle Parts
- Aluminum Machining
- Titanium Machining
- Stainless Steel Machining
- Copper Machining
- Brass Machining
- Super Alloy Machining
- Peek Machining
- UHMW Machining
- Unilate Machining
- PA6 Machining
- PPS Machining
- Teflon Machining
- Inconel Machining
- Tool Steel Machining
- More Material

