Spur Gear Accuracy and Gear Tolerance
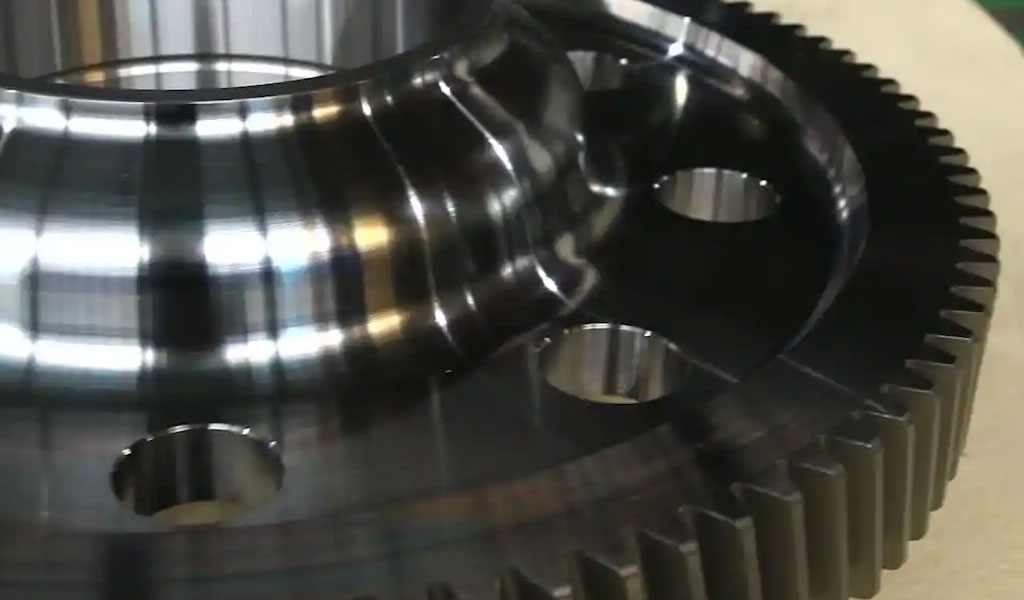
Spur gears are one of the simplest and most widely used gear types in mechanical systems. Their primary function is to transmit motion and torque between two parallel shafts through the engagement of their teeth. The efficiency and performance of spur gears depend on the precision with which their teeth are manufactured and how accurately they are meshed. Gear accuracy and gear tolerance are critical factors in ensuring the proper functioning of spur gears in mechanical applications. This article explores the principles of spur gear accuracy, the concept of gear tolerance, and the methodologies used to assess and control these factors in gear manufacturing.
Spur Gear Geometry
Spur gears are characterized by their straight teeth that are parallel to the axis of rotation. The basic geometry of a spur gear includes several parameters, such as the pitch diameter, module, pressure angle, number of teeth, and tooth form. Each of these parameters influences the gear’s ability to transmit torque efficiently and quietly, and variations in any of them can lead to inaccuracies in gear performance.
- Pitch Diameter: The pitch diameter is the diameter of the pitch circle, the theoretical circle where the teeth of two meshing gears make contact. The pitch diameter is critical for ensuring proper meshing and gear ratio.
- Module: The module is the ratio of the pitch diameter to the number of teeth. It is used primarily in the metric system to specify gear size.
- Pressure Angle: The pressure angle is the angle at which the tooth profiles of meshing gears make contact. Common pressure angles for spur gears are 20° and 25°, and the pressure angle affects both the load distribution and the tooth contact.
- Number of Teeth: The number of teeth on a spur gear determines its size and the gear ratio when meshed with another gear. A higher number of teeth typically leads to better load distribution and quieter operation.
The accuracy of these geometric parameters directly impacts the quality and performance of spur gears. Misalignment in the teeth or variations in the pitch diameter or number of teeth can result in noise, vibrations, and reduced efficiency in power transmission.
Gear Accuracy
Gear accuracy refers to how closely a gear's physical dimensions match its intended design specifications. It is a measure of how well the gear teeth are manufactured in relation to the theoretical tooth profile. Gear accuracy is crucial for ensuring smooth and efficient meshing between gears, minimizing backlash, and reducing the risk of premature wear.
There are various levels of gear accuracy, with some of the most common being:
- Grade 1 to Grade 12: These are classifications used by the American Gear Manufacturers Association (AGMA) to define the quality of gear teeth based on their deviation from the ideal tooth profile. The grades range from Grade 1, which represents the highest accuracy and least deviation from the design, to Grade 12, which allows for more deviation and is suitable for lower-precision applications.
- AGMA Quality Numbers: AGMA also defines gear accuracy using quality numbers, which are based on the maximum allowable errors in tooth size, spacing, and alignment. The higher the quality number, the more precise the gear is.
Spur gears are subject to several types of geometric errors that can affect their accuracy, including:
- Tooth Profile Error: This error occurs when the tooth form deviates from the ideal involute curve, which is the standard tooth profile for spur gears. Tooth profile errors can lead to improper contact between meshing gears, causing inefficient power transfer, increased wear, and noise.
- Pitch Error: Pitch error refers to deviations in the spacing between teeth, which can cause variations in gear ratio and lead to uneven load distribution.
- Runout Error: Runout refers to the deviation of the gear’s surface from its ideal circular form. This can lead to uneven tooth contact and increased wear during operation.
- Tooth Alignment Error: This error occurs when the teeth of the gear are not properly aligned with the axis of rotation. Misalignment can result in poor meshing with mating gears, leading to vibrations, noise, and reduced efficiency.
Spur gear accuracy is typically measured using specialized instruments such as gear testers, coordinate measuring machines (CMM), and profile projectors. These instruments can detect deviations in tooth form, pitch, and alignment, allowing manufacturers to identify and correct errors before the gears are put into service.
Gear Tolerance
Gear tolerance refers to the allowable variation in the dimensions and geometry of a gear that still ensures its proper functionality. In gear manufacturing, tolerances are specified for various parameters, including the number of teeth, pitch diameter, tooth form, and tooth spacing. These tolerances ensure that gears will mesh properly with their counterparts and will function as intended in the system.
Tolerances are essential in determining the quality of a gear and its ability to perform in a specific application. Tight tolerances are required for high-precision applications such as aerospace, automotive, and robotics, while looser tolerances may be acceptable in less demanding applications.
Gear tolerances are typically defined according to international standards such as ISO 1328, which classifies gear accuracy into various grades. These grades take into account both the allowable deviation from the ideal tooth profile and the maximum permissible errors in tooth spacing and alignment.
Some key factors that affect gear tolerance include:
- Pitch Tolerance: The pitch tolerance defines the permissible variation in the spacing between adjacent teeth. If the pitch is too variable, the gears may fail to mesh properly, leading to increased friction, wear, and noise.
- Tooth Thickness Tolerance: The tooth thickness tolerance defines the allowable variation in the thickness of each tooth. Variations in tooth thickness can affect the load distribution and lead to uneven wear.
- Tooth Profile Tolerance: The tooth profile tolerance specifies the allowable deviation from the ideal involute curve. If the tooth profile deviates too much, it can cause poor contact between meshing gears, leading to a loss of efficiency and excessive wear.
- Runout Tolerance: Runout tolerance specifies the allowable variation in the circularity of the gear’s surface. Excessive runout can cause uneven tooth contact, increasing noise and reducing the lifespan of the gear.
- Backlash Tolerance: Backlash refers to the slight movement that occurs between meshing gears when the direction of rotation changes. A small amount of backlash is necessary to prevent binding, but excessive backlash can result in reduced accuracy and efficiency. The allowable backlash tolerance is an important consideration in gear design and manufacturing.
Manufacturers must balance the need for tight tolerances with the practical constraints of production. Achieving extremely tight tolerances can increase the cost of gear manufacturing due to the need for high-precision equipment and additional quality control measures. However, for high-performance applications, tight tolerances are often necessary to ensure optimal gear performance.
Methods of Achieving Gear Accuracy and Tolerance
To achieve the desired level of gear accuracy and tolerance, manufacturers employ a variety of techniques and processes. These processes are designed to minimize geometric errors and ensure that the gears meet the required specifications. Some of the most common methods used to improve gear accuracy include:
- Gear Cutting: Gear cutting is the process of manufacturing gear teeth using various methods such as hobbing, milling, and shaping. The accuracy of the gear teeth depends on the precision of the cutting tools and the machinery used. For high-precision gears, CNC (Computer Numerical Control) machines are often used to ensure that the gear teeth are cut with minimal deviation from the intended profile.
- Grinding: Gear grinding is a finishing process used to improve the accuracy and surface finish of gear teeth. Grinding is typically used for high-precision gears or gears with very tight tolerances. The grinding process removes small amounts of material to achieve the desired tooth profile and minimize errors.
- Lapping: Lapping is a process used to improve the surface finish of gear teeth and reduce surface irregularities. In this process, gears are pressed against a rotating abrasive surface, which smooths out any rough areas and reduces the overall tooth profile error.
- Heat Treatment: Heat treatment is often used to improve the hardness and wear resistance of gears. Processes such as carburizing, quenching, and tempering can be used to enhance the material properties of the gear while maintaining dimensional accuracy. However, heat treatment can sometimes introduce distortions in the gear’s geometry, so careful control is required to maintain the desired tolerances.
- Inspection and Measurement: Regular inspection and measurement are crucial to ensuring that gears meet the required accuracy and tolerance standards. Gear testers, CMMs, and other specialized instruments are used to measure tooth form, pitch, runout, and alignment. These measurements allow manufacturers to identify deviations and make necessary adjustments to the manufacturing process.
Applications and Importance of Gear Accuracy and Tolerance
The accuracy and tolerance of spur gears are essential in a wide range of applications, from consumer electronics to heavy industrial machinery. Gears that are manufactured with high precision and tight tolerances can deliver smoother operation, higher efficiency, and longer service life. Conversely, gears that are poorly manufactured or outside of acceptable tolerances may result in noisy operation, increased wear, and reduced system performance.
In industries such as aerospace, automotive, robotics, and medical devices, gear accuracy and tolerance are especially critical. For example, in aerospace applications, spur gears are used in engines, actuators, and control systems, where even slight inaccuracies can compromise the safety and reliability of the system. Similarly, in the automotive industry, gears are critical components in transmissions, differential systems, and powertrains, where gear accuracy plays a key role in smooth and efficient power transmission.
Moreover, gear tolerance is an important consideration in the design of gearboxes and gear reduction systems. For these applications, minimizing backlash and ensuring proper gear meshing are crucial to achieving smooth power transfer and minimizing mechanical losses.
Reprint Statement: If there are no special instructions, all articles on this site are original. Please indicate the source for reprinting:https://www.cncmachiningptj.com/,thanks!
 3, 4 and 5-axis precision CNC machining services for aluminum machining, beryllium, carbon steel, magnesium, titanium machining, Inconel, platinum, superalloy, acetal, polycarbonate, fiberglass, graphite and wood. Capable of machining parts up to 98 in. turning dia. and +/-0.001 in. straightness tolerance. Processes include milling, turning, drilling, boring, threading, tapping, forming, knurling, counterboring, countersinking, reaming and laser cutting. Secondary services such as assembly, centerless grinding, heat treating, plating and welding. Prototype and low to high volume production offered with maximum 50,000 units. Suitable for fluid power, pneumatics, hydraulics and valve applications. Serves the aerospace, aircraft, military, medical and defense industries.PTJ will strategize with you to provide the most cost-effective services to help you reach your target,Welcome to Contact us ( [email protected] ) directly for your new project.
- 5 Axis Machining
- Cnc Milling
- Cnc Turning
- Machining Industries
- Machining Process
- Surface Treatment
- Metal Machining
- Plastic Machining
- Powder Metallurgy Mold
- Die Casting
- Parts Gallery
- Auto Metal Parts
- Machinery Parts
- LED Heatsink
- Building Parts
- Mobile Parts
- Medical Parts
- Electronic Parts
- Tailored Machining
- Bicycle Parts
- Aluminum Machining
- Titanium Machining
- Stainless Steel Machining
- Copper Machining
- Brass Machining
- Super Alloy Machining
- Peek Machining
- UHMW Machining
- Unilate Machining
- PA6 Machining
- PPS Machining
- Teflon Machining
- Inconel Machining
- Tool Steel Machining
- More Material

