How to Use Caliper Measuring Tools
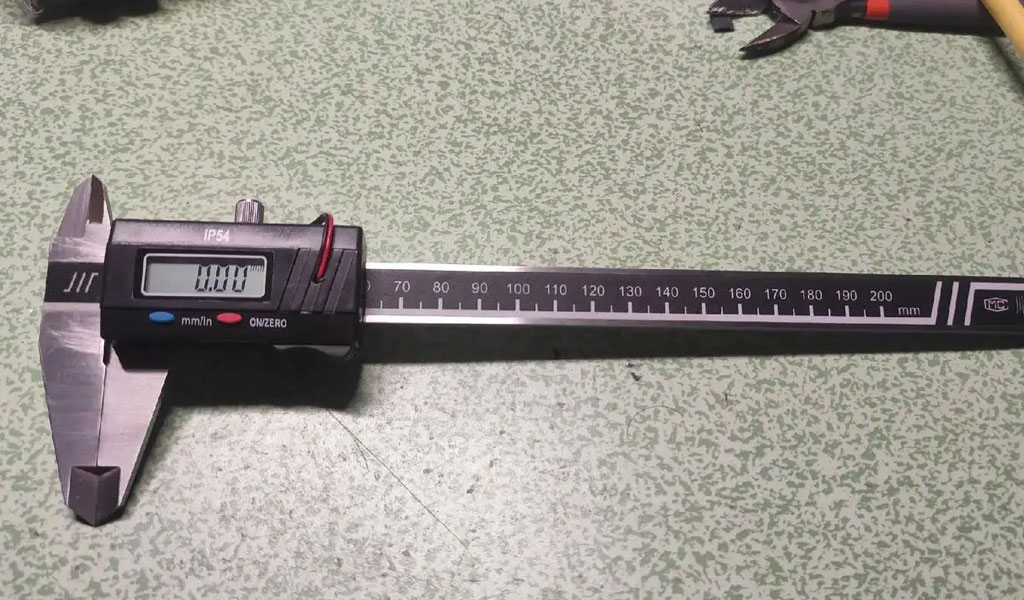
Calipers are essential precision measuring tools used in various fields, including engineering, manufacturing, and woodworking. They provide a method for accurately measuring dimensions such as length, width, depth, and internal and external diameters of objects. This article will comprehensively explore the types of calipers, their components, and how to use them effectively.
1. Overview of Calipers
1.1 Definition
A caliper is a device used to measure the distance between two opposite sides of an object. The term can also refer to the mechanism that allows for these measurements, which can be either digital or analog.
1.2 History
The history of calipers dates back to ancient civilizations, where rudimentary measuring devices were used in various applications. The modern caliper has evolved significantly, with advancements in technology leading to more precise and user-friendly designs.
1.3 Types of Calipers
Calipers can be classified into several types based on their design and measurement capabilities:
- Vernier Calipers: These feature a sliding scale (the vernier scale) that allows for precise measurement of dimensions.
- Dial Calipers: Equipped with a dial indicator, these calipers provide a visual representation of measurements, allowing for quick reading.
- Digital Calipers: These use electronic displays to provide measurements and often feature advanced functions such as conversion between units.
1.4 Components of Calipers
Understanding the components of calipers is essential for proper usage. Key components include:
- Main Scale: The primary scale used for measurements.
- Vernier Scale: An additional scale that allows for more precise measurements.
- Depth Rod: A rod that extends from the caliper body for measuring depth.
- Jaws: The parts of the caliper that clamp around an object for measurement.
- Locking Screw: A screw that locks the caliper in place once a measurement is taken.
2. Choosing the Right Caliper
Selecting the appropriate type of caliper depends on the specific requirements of the measurement task. Considerations include:
- Measurement Range: Ensure the caliper can accommodate the size of the objects being measured.
- Precision: Different calipers offer varying degrees of precision. Choose one that meets the accuracy requirements of the project.
- Material: Calipers are made from various materials, such as stainless steel or plastic. Select a material based on durability and intended use.
- Features: Digital calipers may offer additional features such as data output, while analog types may be simpler but still effective.
3. Preparing to Measure
Before using a caliper, it is essential to prepare both the tool and the object being measured. Follow these steps:
3.1 Calibration
Ensure that the caliper is calibrated correctly. This may involve checking against a known standard or zeroing the caliper to ensure accurate readings.
3.2 Clean the Measuring Surfaces
Both the caliper jaws and the object should be clean and free of debris. Dirt or residue can affect measurement accuracy.
3.3 Select the Appropriate Measurement Mode
For digital calipers, choose the desired measurement mode (inches or millimeters) to ensure compatibility with the project's requirements.
4. Using a Vernier Caliper
4.1 Reading the Main Scale
To take a measurement with a vernier caliper, follow these steps:
- Open the Caliper: Widen the jaws to accommodate the object being measured.
- Position the Object: Place the object between the jaws, ensuring it is held securely.
- Close the Jaws: Gently close the jaws around the object without applying excessive force.
4.2 Reading the Vernier Scale
- Identify the Main Scale Reading: Look at the main scale to find the last whole unit before the zero of the vernier scale.
- Find the Vernier Scale Reading: Identify which line on the vernier scale aligns precisely with a line on the main scale. This gives the additional fraction of a unit.
- Combine the Readings: Add the main scale reading to the vernier scale reading to obtain the final measurement.
4.3 Measuring Depth
- Extend the Depth Rod: Use the depth rod by extending it from the back of the caliper.
- Insert into the Hole or Groove: Position the rod into the area needing measurement.
- Take the Measurement: Read the depth from the main and vernier scales as previously described.
5. Using a Dial Caliper
5.1 Taking a Measurement
- Open the Caliper: Widen the jaws appropriately.
- Position the Object: Place the object securely between the jaws.
- Close the Jaws: Gently close the jaws until they make contact with the object.
5.2 Reading the Measurement
- Observe the Dial: The dial displays the measurement directly. Note the reading where the needle points.
- Check for Additional Scales: If the caliper has multiple scales, ensure you are reading the correct one.
6. Using a Digital Caliper
6.1 Initial Setup
- Power On the Caliper: Turn on the digital caliper using the designated button.
- Select Measurement Unit: Switch between inches and millimeters if necessary.
6.2 Measuring
- Open the Caliper: Adjust the jaws to fit around the object.
- Position the Object: Secure the object between the jaws.
- Close the Jaws: Gently close the jaws around the object.
6.3 Reading the Measurement
- Read the Display: The measurement will be displayed on the digital screen.
- Check for Tolerance: Many digital calipers also display tolerance limits for specific measurements.
7. Common Measurement Applications
Calipers can be used in various applications, including:
- Mechanical Engineering: For precise measurements of components.
- Woodworking: To measure thickness and dimensions of materials.
- Jewelry Making: For accurate measurements of small parts.
- Automotive: To ensure proper fitment of engine components.
8. Maintenance of Calipers
Proper maintenance of calipers ensures their longevity and accuracy. Key maintenance practices include:
8.1 Cleaning
Regularly clean the caliper, especially the jaws and sliding surfaces, to remove dirt and debris. Use a soft cloth and appropriate cleaning solutions.
8.2 Calibration Checks
Periodically check the calibration of the caliper against known standards to ensure ongoing accuracy.
8.3 Storage
Store calipers in a protective case or pouch to prevent damage when not in use. Avoid exposing them to extreme temperatures or moisture.
9. Conclusion
Caliper measuring tools are invaluable in various fields, offering precision and versatility for a wide range of applications. Understanding how to use and maintain calipers properly is essential for achieving accurate measurements. By following the guidelines outlined in this article, users can maximize the effectiveness of their calipers, ensuring consistent performance in their measurement tasks.
Reprint Statement: If there are no special instructions, all articles on this site are original. Please indicate the source for reprinting:https://www.cncmachiningptj.com/,thanks!
 PTJ® provides a full range of Custom Precision cnc machining china services.ISO 9001:2015 &AS-9100 certified. 3, 4 and 5-axis rapid precision CNC machining services including milling, turning to customer specifications,Capable of metal & plastic machined parts with +/-0.005 mm tolerance.Secondary services include CNC and conventional grinding, drilling,die casting,sheet metal and stamping.Providing prototypes, full production runs, technical support and full inspection.Serves the automotive, aerospace, mold&fixture,led lighting,medical,bicycle, and consumer electronics industries. On-time delivery.Tell us a little about your project's budget and expected delivery time. We will strategize with you to provide the most cost-effective services to help you reach your target,Welcome to Contact us ( [email protected] ) directly for your new project.

- 5 Axis Machining
- Cnc Milling
- Cnc Turning
- Machining Industries
- Machining Process
- Surface Treatment
- Metal Machining
- Plastic Machining
- Powder Metallurgy Mold
- Die Casting
- Parts Gallery
- Auto Metal Parts
- Machinery Parts
- LED Heatsink
- Building Parts
- Mobile Parts
- Medical Parts
- Electronic Parts
- Tailored Machining
- Bicycle Parts
- Aluminum Machining
- Titanium Machining
- Stainless Steel Machining
- Copper Machining
- Brass Machining
- Super Alloy Machining
- Peek Machining
- UHMW Machining
- Unilate Machining
- PA6 Machining
- PPS Machining
- Teflon Machining
- Inconel Machining
- Tool Steel Machining
- More Material

